Admin Help
Expand the topics below to find a specific topic.
Signing In
Signing in as a returning user
After your first-time sign-in you can return to Partner University at any time and sign in with the same email account you used when you registered.
- Use this URL for return visits:
Microsoft account: https://partneruniversity.microsoft.com/administration?whr=uri:MicrosoftAccount
- For easy access, add this URL to your browser's list of favorites or bookmarks.
Accessing the learner site
If you want to experience the learner site, sign in at http://partneruniversity.microsoft.com.
If you are logged into the Administrator site you can jump to the learner site by clicking your name (or email address if Privacy is enabled) in the upper right corner of the screen, and then clicking the link to the Learner site.
Returning to the admin site
To return to your admin site:
- On the home page, in the upper-right section, click the drop-down arrow next to your name.
- From the resulting menu, select Admin site.
Understanding roles
A user can be assigned multiple roles. Every user is automatically assigned the Learner role and it cannot be removed. Anyone with the Administrator role can manage roles and assign additional roles to any other user. Each role in the system is explained below:
Administrator
There is typically only one administrator for an organization.
Instructor
There can be multiple instructors for one organization. One instructor can be associated with several organizations.
- Creates and manages learning plans and groups.
- Assigns online learning to learners
Reports Administrator
Use this role for any user who will need to generate progress and course completion reports for the organization. Site admins and Instructors are also able to view reports.
- Views reports that show the percentage of completion of learning plans, courses, and assessments.
Learner
All accounts include the learner role
- Signs in to the learner site.
- Participates in courses.
Adding and editing groups
Creating groups can greatly streamline the process of assigning relevant training to multiple users, as well as acquiring reporting data on a specific set of users.
Since groups can also contain sub-groups, it is a good idea to consider or plan for a logical group hierarchy based on how you might assign training or view reporting data. Below is an example of a group hierarchy where Fall 2013 Sessions is the parent group and Course 1020 and Course 1030 are sub-groups.
Example parent group and sub-groups:
Fall 2013 Sessions
Course 1020
Course 1030
To add a group:
- From the home page, click the Groups tile to display the Groups list.
- Click Add group to display the Add/Edit group form.
- Enter the Group name.
- Enter a Description for your group. (The description should provide context as to the group's purpose and assist with establishing consistency when there are multiple administrators.)
- Click Save to create the group. Once your group is saved you will be prompted to either add members or wait to add members at a later time.
- If you choose to add members, you will be able to choose from the existing users and groups. Existing users are those in your company who have logged into or onboarded to Partner University. When your coworkers onboard to Partner University, their names will appear in your Groups tile. If they have not onboarded, you won’t be able to assign them Learning Plans or see their names in your Groups tile. Please encourage your coworkers to onboard to Partner University if they haven’t done so. Please give them this link to access the onboarding instructions:
- https://assets.microsoft.com//PartnerU-Site-LoginInstructions_FINAL-Launch2015.docx
- Click Add for each respective user and/or group you want to add to the current group, and then click Save.
- You can at any time manage the members of your group by locating your group in the Groups list, and then choosing the Manage users in this group icon.
To manage group members:
- To display the Groups list, on the home page, click the Groups tile.
- To locate the group you want to edit, review the list of groups or type a name in the Search for groups field.
- On the specific group entry, click the Manage users in this group icon.
- This will show you a grid view of all the active users in the organization and you can filter on which users are assigned vs unassigned to the group.
- You can select users from this grid (the Users tab above the list is selected by default) and, in the Edit assignment options, click Assign or Unassign to add or remove their association with the group.
- Similarly you can click the Groups tab and then select groups and assign or unassign them from the parent group.
- Applying these changes should give you a confirmation message of all the users who have been added or removed from the group.
To edit a group's name and/or description:
- From the home page, click the Groups tile to display the Groups list.
- Locate the Group you want to edit.
- On the specific group entry, click the Edit group icon.
- On the resulting screen, modify the group name and/or description as desired, and then click Save.
To delete a group:
If you delete a group the group container is permanently deleted, but all sub-groups and individual users are preserved.
- From the home page, click the Groups tile to display the Groups list.
- Locate the Group you want to delete.
- On the specific group entry, click the Delete group icon.
- On the resulting alert message, confirm you want to delete the selected group by clicking OK.
Previewing and evaluating courses
Currently, training can only be viewed and evaluated from the learner site.
To view online training courses:
- Sign in at the learner site
If you are logged into the Administrator site you can jump to the learner site by clicking your name (or email address if Privacy is enabled) in the upper right corner of the screen, and then clicking the link to the Learner site.
You can also search for the course on the admin site, and click to start it, as you would on the learner site. This automatically takes you to the learner site and starts the course.
- You can find training in a couple of ways:
- Click Browse and then select a subject. On the resulting page, explore the results. By default, the results are courses in the language listed on your profile page. If you'd like to search for courses in a different language, above the course results, in the Narrow by course language menu, click the drop-down arrow and select another language from the list. You can use the sorting option at the top to sort the list by the available sort criteria.
- In the search box at the upper right corner of the screen, enter search terms related to the content you desire, and then press Enter or click the Search icon to execute your search. Relevant results will display. By default, the results are courses in the language listed on your profile page. If you'd like to search for courses in a different language, above the course results, in the Narrow by course language menu, click the drop-down arrow and select another language from the list. You can use the sorting option at the top to sort the results by the available sort criteria.
- When you see a course that interests you, click the course title to begin playing the course, or click the Syllabus icon to review the contents of the course.
- Once you have located courses of interest, note the course numbers so you can search for those course numbers in the Administrator site to assemble your learning plans.
- To return to the Administrator site, click your name or email address in the upper right corner of the screen, and then click the link to the Admin site.
Managing training for users and groups
About learning plans
A learning plan is a set of courses designed to help a user work toward a goal, such as learning a new set of skills or earning a certification. Learning Plans can be assigned directly to individual students or groups that you have already established, or they can be assigned via enrollment codes.
Before creating Learning Plans, consider the following:
- Target audience: Who are the specific students or groups that will consume the Learning Plan?
- Relevant content: What content is most relevant for the specific audience of the Learning Plan?
- Naming convention: What kind of naming convention will assist your learners as well as yourself and other administrators in understanding the purpose of the Learning Plan and differentiating it from other Learning Plans?
Creating learning plans
To create a learning plan:
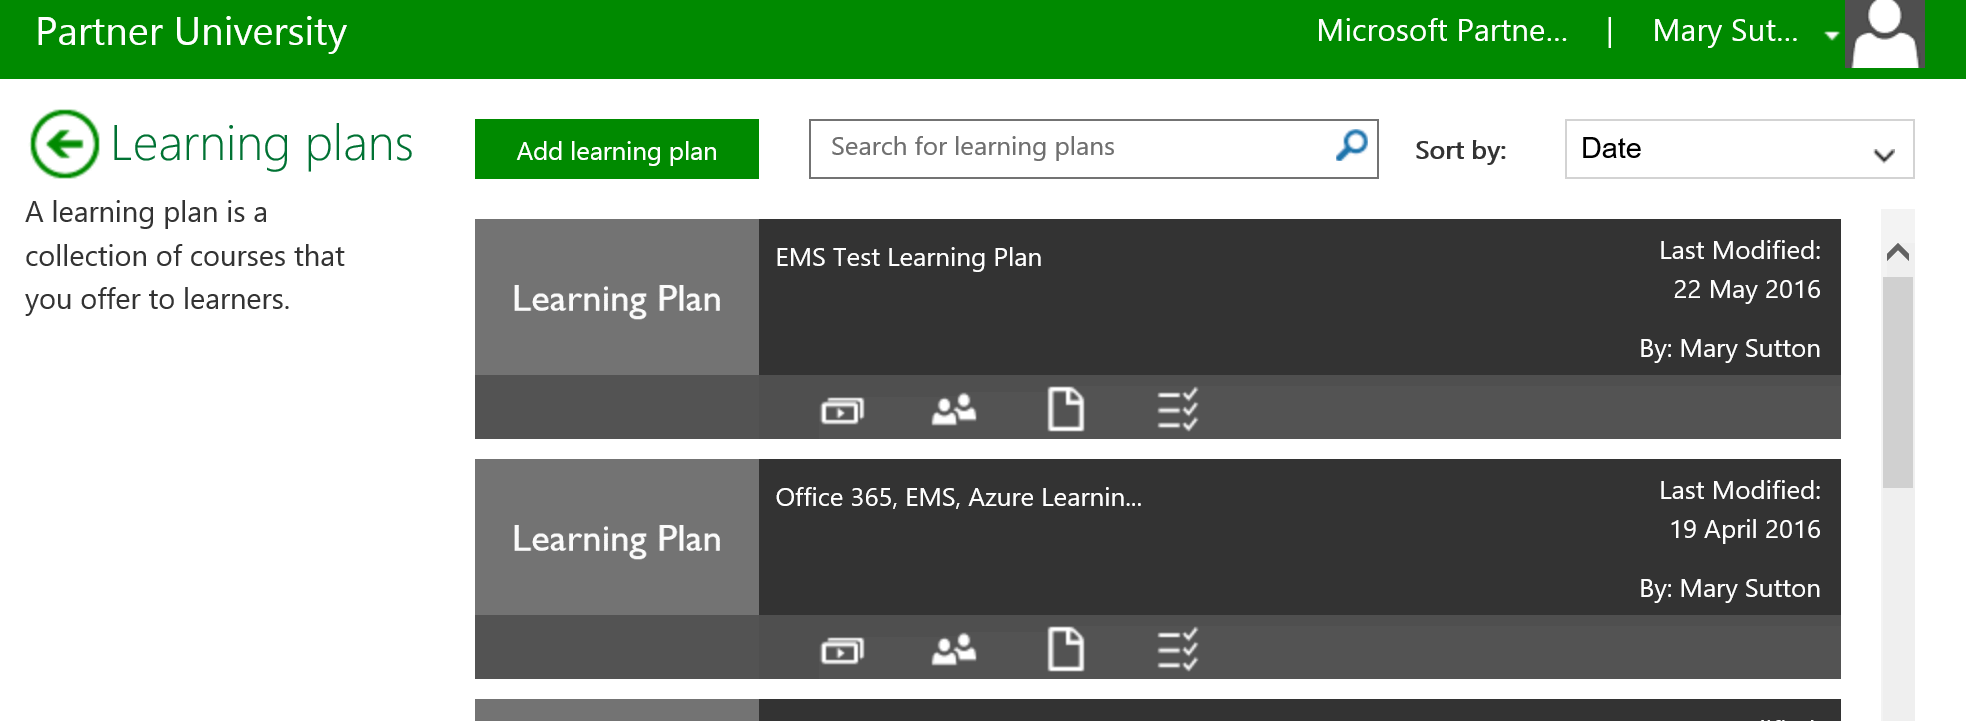
- From the home page, click the Learning Plans tile.
- Click the green button near the top of the page that reads; "Add Learning Plan"
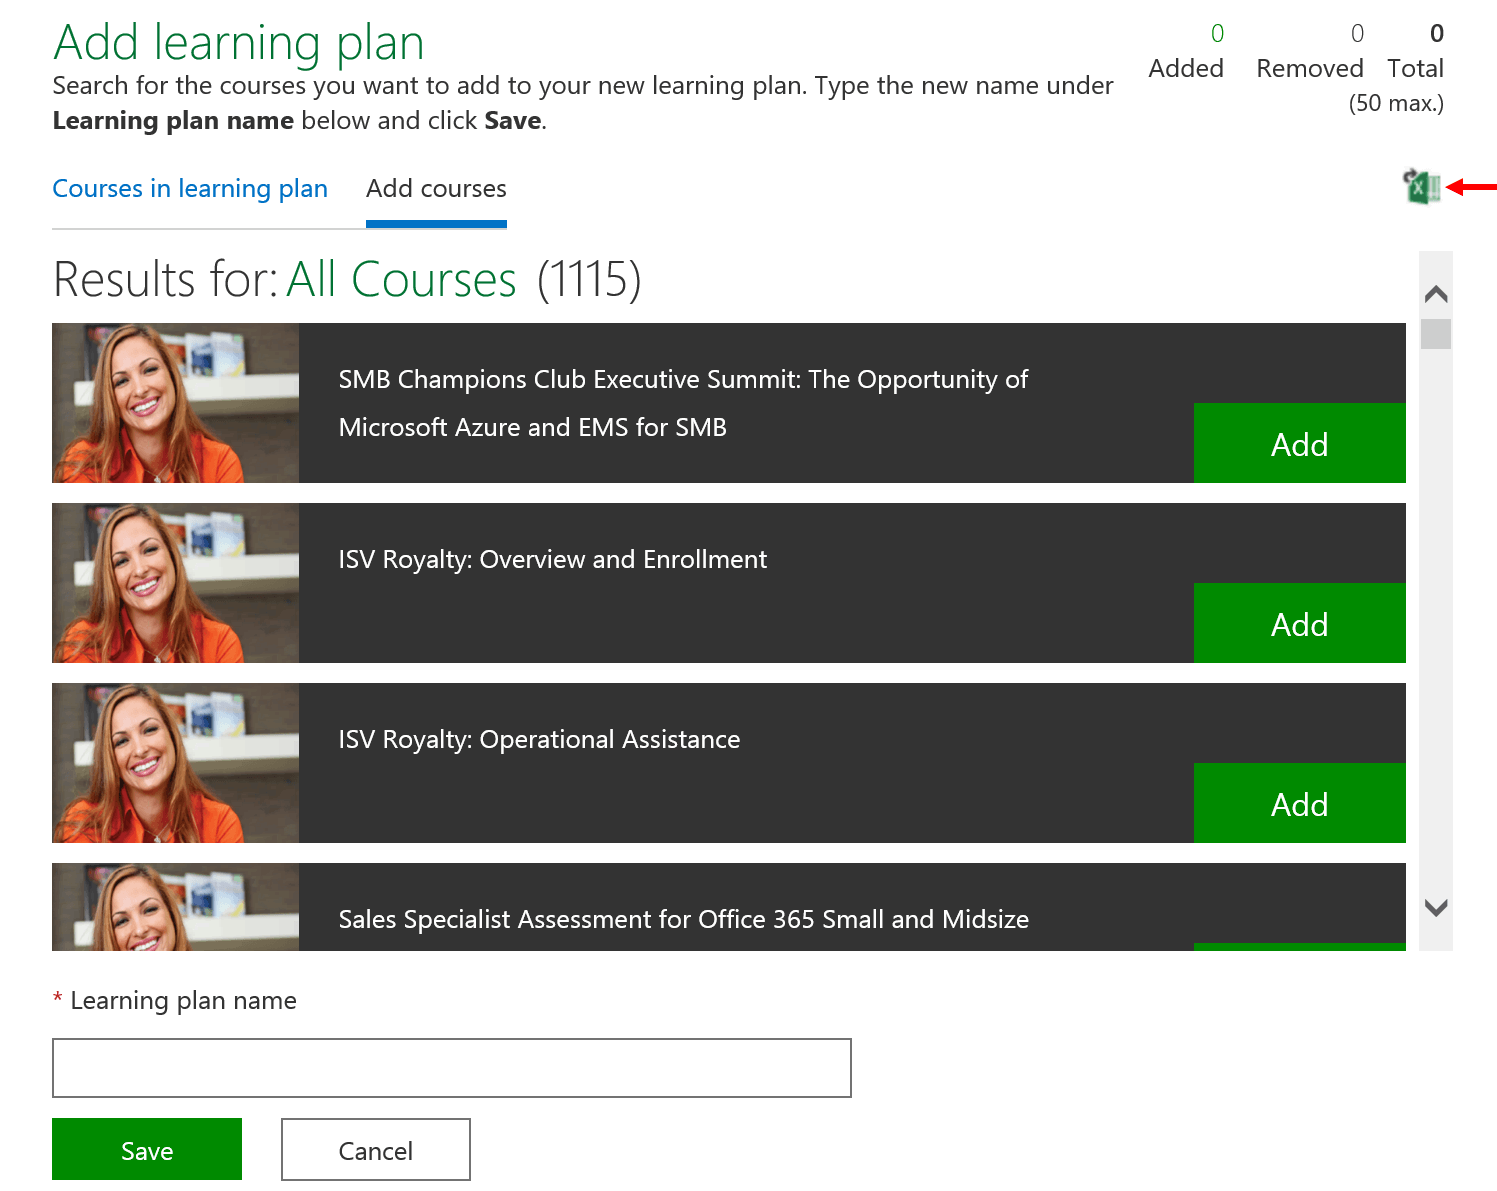
- You will be prompted to search for the courses you want to assign in your Learning Plan. You can use the filters on the left hand side to narrow your search. Be careful: clicking on any of the course titles will launch the course and will take you out of the Admin site; you will then need to find your way back to the spot where you were creating the Learning Plan. Click on the green "Add" button to add a course to your Learning Plan.
- We recommend that you determine the courses to assign in advance, and have a list of the courses with you (or the unique MPN number for each course) in order to make the step of adding the courses easier and faster. You can assign up to 50 courses total in a Learning Plan.
- An alternate way to find the courses you want to assign is this: look for the small Excel icon in the top right-hand corner of the page. If you hover over this icon, the word “download” will appear. Clicking on this icon will download a list of all courses published to date in Partner University. You can save the list to your desktop and sort the data as needed, to find the courses to include in your Learning Plan.
- At any time you can review the list of courses in your Learning Plan by clicking the "Courses in Learning Plan" link near the top of the page.
- Once you have added the required courses, you can add a name in the "Learning plan name" box and click save. Note: the name must be unique and not a duplicate of any other Learning Plan names you’ve created.) You will then see a message that says "Notification email has been sent to the users assigned to this Plan" when you save it … this is an error in the system; just ignore this.
- On the home page, click the Learning Plans tile.
- To locate the specific learning plan to which you want to assign users, type a name in the Search for learning plans field, or scroll through the list.
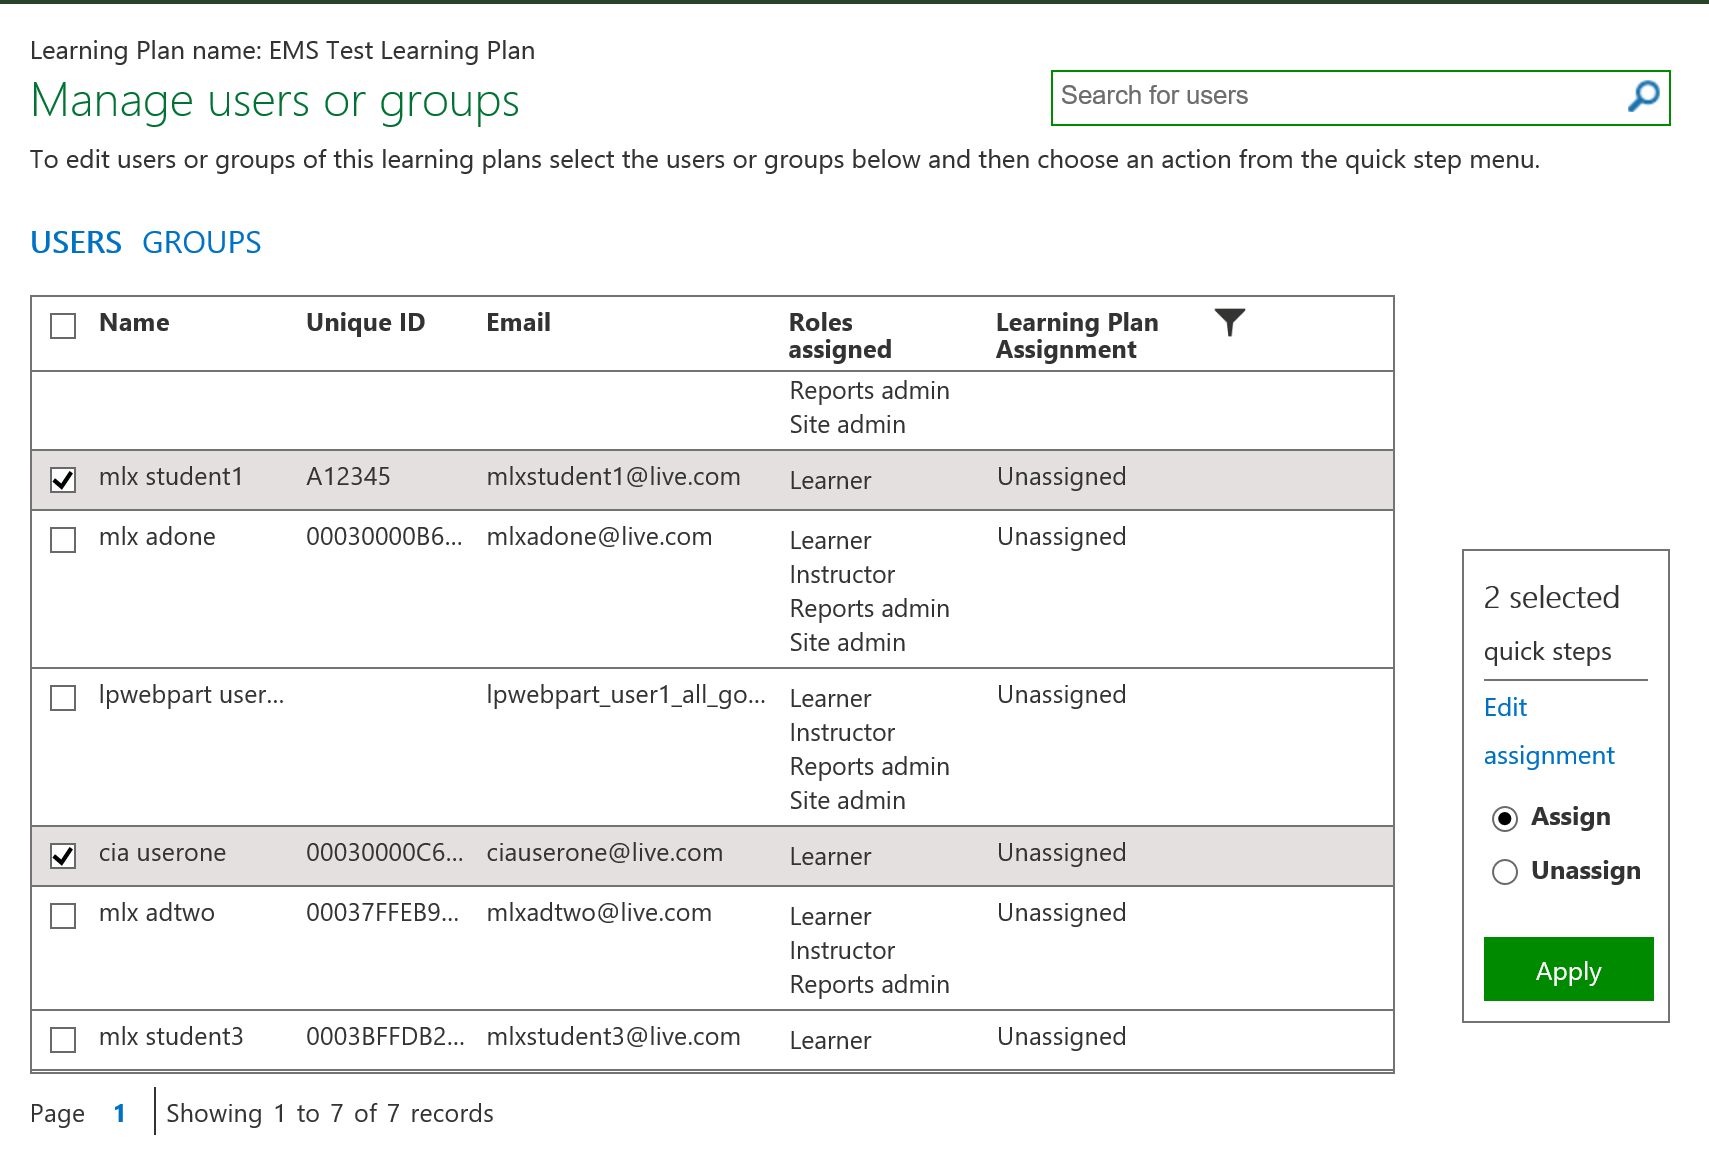
- On the specific learning plan, click the Manage Users icon. This will be the icon that looks like two people.
- This opens a grid view where you can see all the active users in the organization.
- You can select users from this grid (the Users tab above the list is selected by default) and, in the Edit assignment options, click Assign or Unassign to assign the plan to them or remove them as learners from the plan.
- Similarly, you can click the Groups tab and then select groups and assign or unassign them from the parent group.
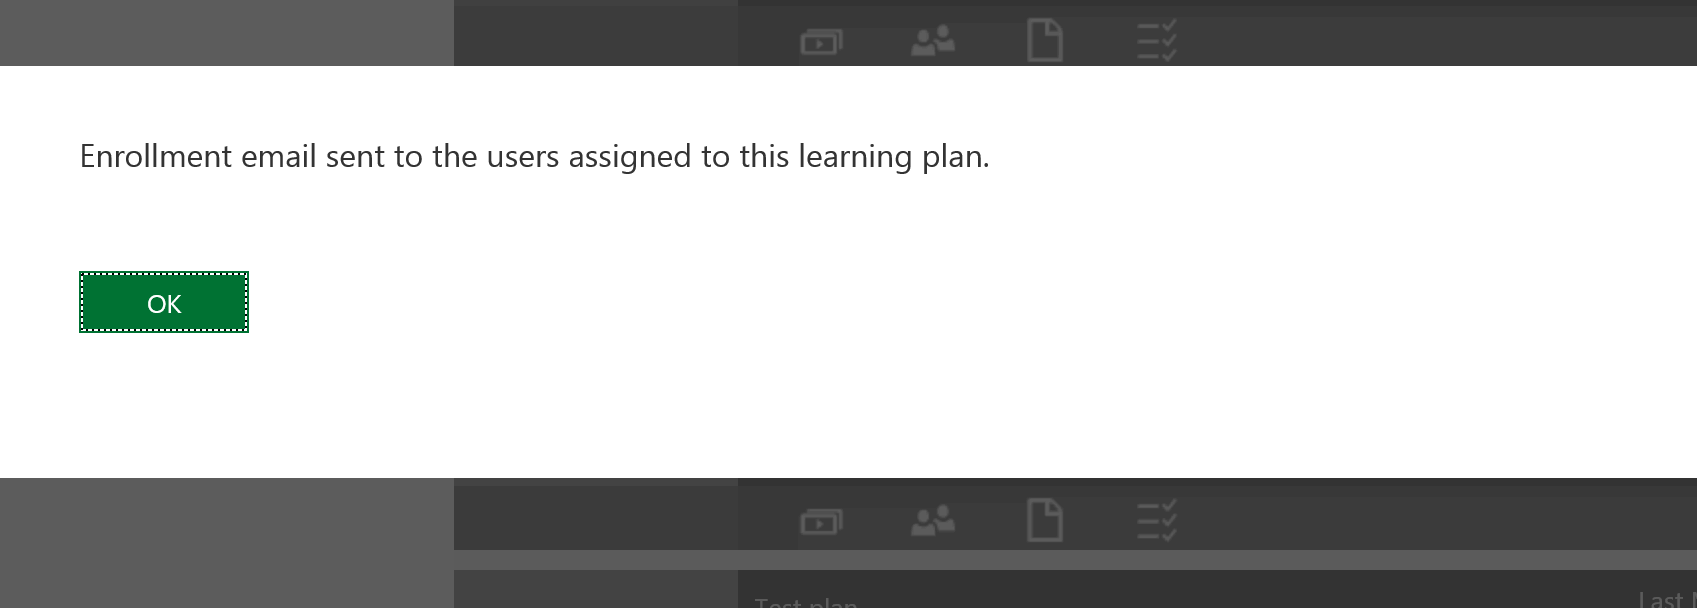
- When you click "Apply" to finalize these changes, an e-mail will be sent to the users with an enrollment link for the learning plan.
- On the home page, click the Learning Plans tile.
- Click the specific learning plan that you would like to modify.
- To see a list of the courses currently in the learning plan, click the Courses in learning plan tab.
- To remove courses from the learning plan, on a specific course listing, click Remove.
- To add courses to the learning plan, do one of the following:
- Click the Browse tab, and then browse through the courses. On a specific course listing, click Add.
- Click the Search tab, and then use the search function to find a course. On the specific course listing, click Add.
- When you are finished modifying the contents of a learning plan, if you would like to keep its existing name, click Save.
- If you would like to update the name of the learning plan, type the new name into the Learning plan name field. This name must be unique within the organization. Click Save.
- In the confirmation dialog, review your changes and then click OK to apply the changes.

The next step is to distribute the learning plans to users, which can be done at any time. There are a couple of ways to do this, as explained in the next topic.
Distributing learning plans to users
After creating a learning plan you can assign it to users in your organization.
To assign a learning plan to users and/or groups:
Note: the email will be sent to the user’s personal email address (the one s/he uses to log into Partner University), *not* the user’s work email address. Please notify email recipients to check their personal email accounts and possibly their Junk or Clutter folders, for the email invitation to the Learning Plan you’ve assigned.
Modifying the contents of a learning plan
To modify the contents of a learning plan:
Accessing Reports
Only those users who are assigned the MPN Administrator or MPN Training Administrator role have access to report data on this site. See below for specifics.
To view reports by group:
To access reports specific to a group, do the following:
- From the home page, click the Groups tile.
- Locate the specific group you would like to report on. Use Search to expedite this process.
- On the desired group, click either of the following options for the available reports:
- Course activity report: This report shows each course the group has made progress against, the details for each group member, and the amount of progress.
- Assessment activity report: This report shows each assessment the group has started or completed and the related scoring for each member of the group.
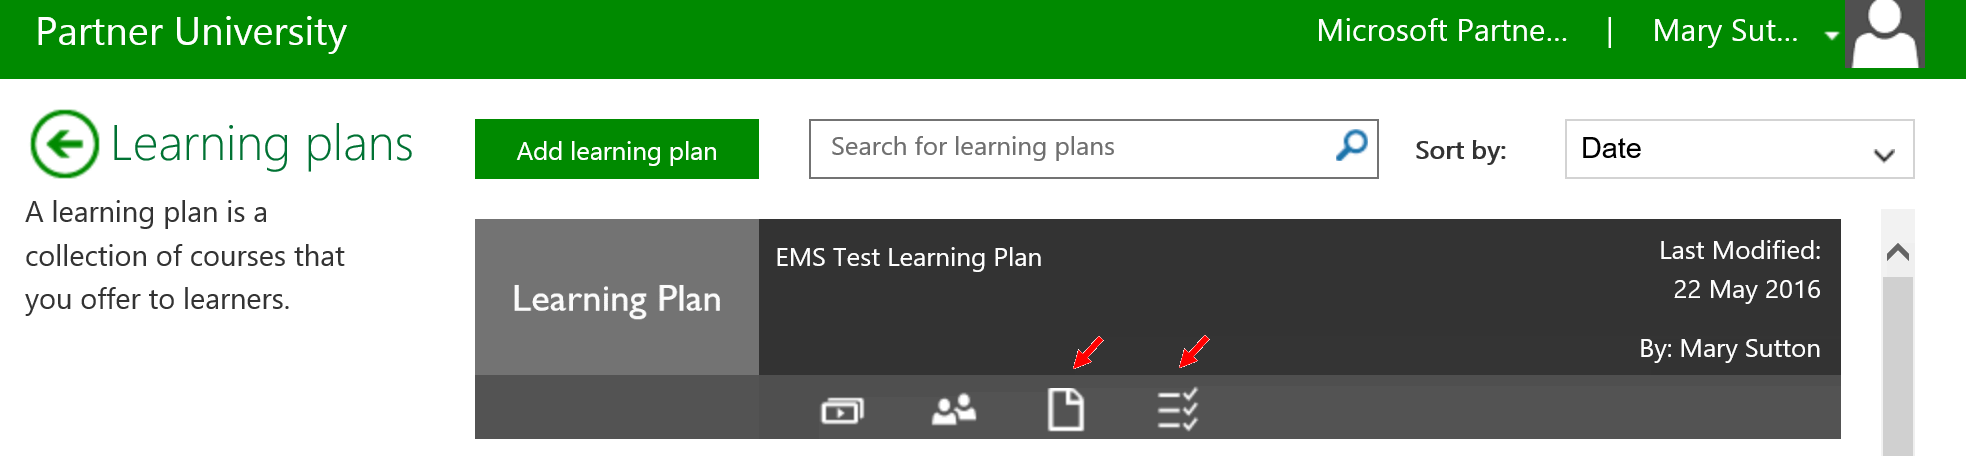
To view reports by learning plan:
To access reports specific to a group, do the following:
- From the home page, click the Learning Plans tile.
- Locate the specific learning plan you would like to report on. Use Search to expedite this process.
- On the desired learning plan, click either of the following options for the available reports:
- Course activity report: The icon for this report is the page icon. This report shows each course within the learning plan and the progress against it by the individual users.
- Assessment activity report: The icon for this report is the list with checkmarks. This report shows each assessment within the learning plan and the progress and scoring for each user of the learning plan.
Note: The course activity or assessment activity reports are not updated immediately after user action (user taking a course or assessment). The reports are updated four times a day, so check back later if you don't see the expected results.
To view reports for everyone in your company:
These options are available to those who have the Reports Administrator role.
- From the home page, click the Reports tile at the top.
- On the Reports page, specify a date range for your report.
- Click Download next to the specific report(s) you want:
- Course activity report summarizes the course activity across your entire organization.
- Assessment activity report summarizes the assessment activity across your entire organization.
- Open and/or Save the file to your desired location.
Editing your account settings
To update your profile information:
- Click your name (or email address if Privacy is enabled) in the upper right corner of the screen, and then click Edit profile.
- Make the desired changes to your profile and click Save. Updating the language in the profile page will change your site to the same. The following languages are currently supported:
English, Spanish (LATAM), French (France), German (Germany), Dutch (Netherlands), Italian (Italy), Russian, Portuguese (Brazil), Polish, Swedish (Sweden), Bahasa Melayu; Jawi Script (Malaysia), Arabic (Saudi Arabia), Chinese Traditional, Chinese Simplified, Japanese and Korean.
Note: The contact email address in your profile is where you will receive communication pertaining to your courses (i.e. new learning plans, changes to your learning plans, etc.).This is not necessarily the address you use to log in to Partner University.
Switch organizations
This applies only if you manage training or users at more than one organization, and you use the same sign-in credentials for both.
To switch organizations:
- Click your name (or email address if Privacy has been enabled) in the upper right corner of the screen, and then click Switch Organization.
- In the resulting screen, click the organization you want to change to and then click Save.
Getting additional help
Videos
You can find a link to the Help video in the list under Help topics on the home page of the Administrator site.
FAQ
Frequently Asked Questions (FAQ) can be accessed from any screen where the footer is present. Click FAQ to access and review the list of questions and answers.
Contact Us
If you are in need of assistance, click Contact Us (located in the footer) to send us details about the issue you are experiencing so a technical support analyst can assist you. If you need more immediate assistance, you can call the toll-free number that is available 5:30 am - 5:30 pm.
Signing out
As a best practice, always sign out when you are finished to prevent any other users of the same computer from accessing your account.
- Click your name (or email address if Privacy has been enabled), and then click Sign out.
Clicking Sign out closes your current session and logs you out of the system.